Aurora Scientific’s 1200A/1205A Isolated Muscle systems have been relied upon by researchers worldwide for nearly 20 years. Though the systems have evolved somewhat in that time, the best practices for making contractile measurements of isolated tissue have not. This blog is meant to discuss some of the experimental nuances of performing an in vitro muscle experiment that are not necessarily discussed in the published literature.
For more detailed information about performing an in-vitro experiment with a 1200A system from start to finish please review the JoVE publications linked on our videos page.
Surgical removal and suturing of the muscle
There are two main methods that we have observed for surgically removing and attaching to the muscle of interest. The first method is to surgically remove the muscle and place it into a dish of ringer’s solution before attaching any surgical suture to the tendons. The other involves suturing around the tendon and then cutting distal to the knots before directly transferring to the bath chamber.
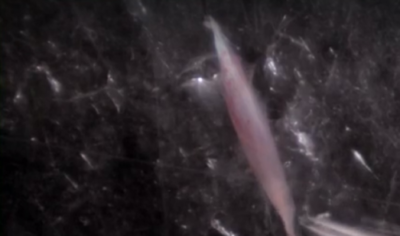
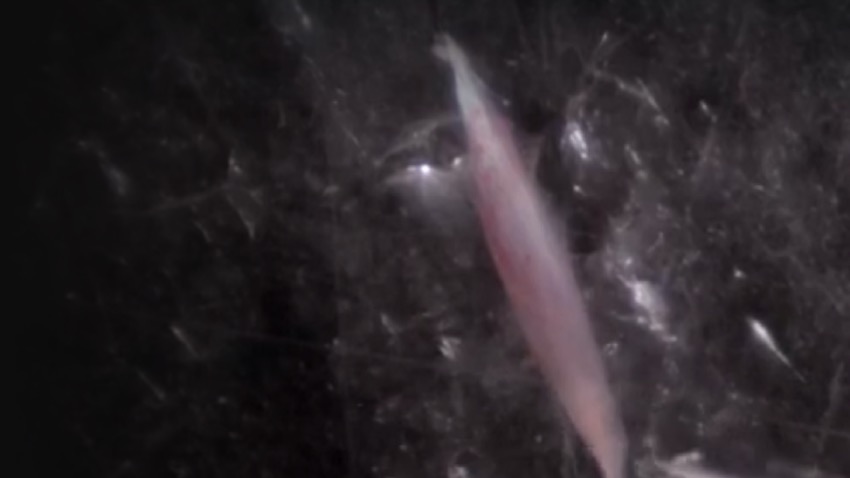
Figure 1: EDL Muscle from Mouse – Surgically removed with Tendons pinned down in Ringer’s bath
The method pictured above has the advantage of allowing the muscle to be removed from the animal’s body relatively quickly. This means that it is not necessary to anesthetize the animal while removing the muscle. It may be fine to simply euthanize the animal and then remove the muscle surgically. To suture to the tendons of the muscle it is essential that the muscle be transferred to a dish filled with chilled ringer’s solution.
A disadvantage of this method requires that the Ringer’s be perfused with carbogen (95% O2/5% CO2; which may require some extra setup on the part of the user). Also, the use of sylgar at the bottom of the dish is essential as the muscle must be pinned down through the tendons to suture to each end. This step can be challenging, and it may be difficult to pin down the muscle reliably such that it is held near its resting length.
Once you have sutured the muscle by this method though there is another advantage. Being able to place pins relative to the muscles position to create a suture loop will make it much easier to attach to the system when we are ready to begin the experiment. After making an initial measurement we can ensure our loops are always the correct size to ideally fit the chamber.
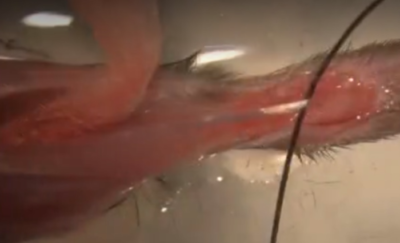
Figure 2: EDL muscle shown with tendon attached and suture tied.
The alternative method (shown above) with the tendon does not necessarily require the animal to be anesthetized. In fact, due to the extra time required to create the suture knots, anesthetizing the animal while the muscle is being isolated may be useful. Furthermore, although the muscle will be kept viable through the animal’s own blood supply, the exposed muscle should periodically be bathed with Ringer’s solution to keep it from drying out.
The biggest advantage of this technique is that the muscle is held in place at its normal resting tension which should make tying the suture knots easier once the tendons are exposed. Depending on how accessible the tendon of the muscle is (say at the knee joint) it may be tougher to cut the tendon and remove the muscle from the body without some slippage of the knots. Take particular care during this step.
Employing this method will also make it a bit trickier to prepare any suture loops unless the leg is placed in a sylgar dish (as shown above) or if the muscle is transferred to a dish before being placed in the system.
We recommend perfusing the Ringer’s solution in the tissue bath with Carbogen during the surgical process so there are no issues with viability of the muscle during the experiment. There is no right or wrong way to perform this surgery, but one should be mindful of these nuances at each step of the surgery to ensure best results!
Use ‘S’ Hooks for easier attachment to the system
Aurora Scientific recommends the use of Stainless Steel ‘S’ Shaped hooks with the 1200A System. Bending thin wire into the shape of an S allows it to be hooked through the tip of a lever arm attached to the Dual-Mode Lever, without the need for any extra adhesive or fixation.
The bottom hook can be screwed into the lower tissue clamp of the 800A in-vitro Muscle Apparatus. It does not necessarily need to be in the shape of an ‘S’, but if a curve is made at both ends with a straight portion between them it may be possible to use the curve to help lock the hook in the clamp more securely.
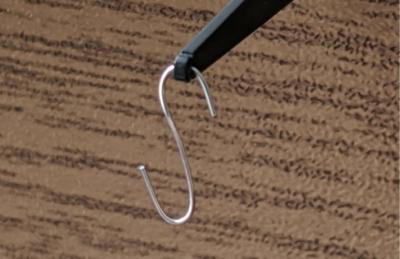
Figure 3: S-Hook shown attached to lever arm
To form the hooks we recommend using a small length of 0.012” stainless steel wire. An example can be found here.
Once the section of wire has been cut we recommend using an Allen key to form the bend, 1.5 or 2mm would be an appropriate size.
With the hooks fixed in place in the system it is time to transfer the muscle to the bath. We recommend attaching at the top first with a pair of forceps so that gravity will let the muscle and the other loop naturally hang down rather than having to pull up to attach the other loop. This will reduce the risk of accidentally over-stretching the muscle or pulling the knots free from the tendon.
With the suture loops attached we should then raise the tissue bath to immerse the muscle in Oxygenated Ringer’s solution and set some appropriate resting tension on the muscle. Be certain to observe whether the suture knots hold when applying this resting tension. The finished result should look something like figure 4 below.

Figure 4: Mouse EDL muscle attached in 1200A system
Equilibration Period and Optimization
Before the experiment begins the muscle should spend some time in the bath held close to its ideal resting tension to equilibrate to its new environment. This equilibration period is typically about 10-15 minutes. One indication that equilibration has occurred will be stabilization of the resting tension baseline of the muscle.
Once the muscle has equilibrated, we should begin the experiments by setting the supramaximal stimulation current of the 701C Electrical Stimulator. We recommend using a constant current vs constant voltage mode, although either is acceptable in this case. For more information on this topic please see our blog “Constant Current vs. Constant Voltage Stimulation”.
For this step, the easiest method of setting the current is to trigger a train of twitches through the InstantStim function in the 615A Dynamic Muscle Control and Analysis Software. The twitch tracings can be easily visualized through the live data monitor and we can stop adjusting the current once they have plateaued. Adding 10% as a factor of safety above this current will not hurt the muscle.
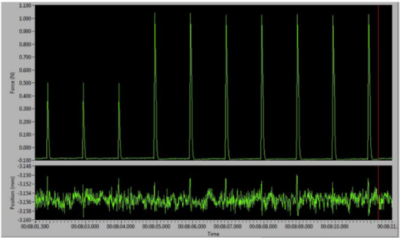
Figure 5: Twitch contractions reaching a plateau on the live data monitor.
With the supramaximal current set, we must begin to stretch the muscle to find its ideal length (Lo). Since we cannot easily observe the sarcomere spacing in the muscle, the only easy way to determine Lo is to slowly stretch the muscle in a step wise fashion and elicit a twitch contraction after each step. When the envelope of the force is a maximum (the difference between peak force and baseline), we know we have reached our Lo and thus sarcomere spacing should also be optimal.
To accomplish this, we recommend using the prepare experiment window in the DMC LabBook software. For those users with an older version of the DMC software, running a simple twitch protocol with autosave enabled and the analysis tab opened in DMC is also suitable. For more detailed information on protocols, check out our “How to Write Basic Protocols in DMC” Blog series. Twitch contractions can be issued by the users, in their own time (as there are no issues with fatiguing the muscle). Once the peak has been found the main set of experiments can begin. Note that for most limb muscles, the ideal length is near slack length so take care not to overstretch the muscle during this step of the process!
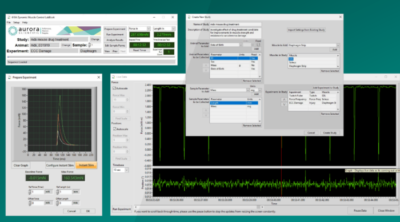
Figure 6: Using the prepare experiment window in DMC LabBook to assist with finding Lo.