The 1600A permeabilized myocyte system is commonly used to investigate the active and passive properties of de-membranized cardiac myocytes. This system offers a robust means of studying the proteins of the cardiac myofilament as the samples are plentiful and can be easily produced. However, since the cells are quite small and generally produce very small force, it makes our highest resolution transducers susceptible to artifacts if care is not taken during the experiment. This blog is meant to provide some helpful information to improve the quality of your measurements and increase experimental throughput.
Select the right glue for the job
Contractile measurements have been made on permeabilized myocytes for many years, and various techniques have been tested including directly suturing the myocytes (Hofmann, Hartzell and Moss (1991)). However, the most common method of attachment has always been using some sort of glue or adhesive. I will discuss the pros and cons of using each method.
Silicone Based glue
This method is perhaps the most common and widely used method and is described here (Sweitzer and Moss (1990)). This involves dragging the attached pins through a silicone-based glue to coat the tips and then using micropositioners to align and press against the cell itself. A silicone ‘blob’ is created between the probe tips and the myocyte itself (see Figure 1). After about 5-10 minutes of curing, the cell must be carefully lifted off the coverslip to ensure that it does not get stuck and destroy the cell as well as damage the instruments. Another 10-20 minutes of curing time for the glue is required before beginning the experiments. Dow Corning has made a silicone glue which has worked well for many years, but recently an aquarium sealant (Marineland) has become a favourite amongst researchers. Silicone adhesives are quite easy to apply because of their viscosity, although throughput is extremely limited because of long cure time.
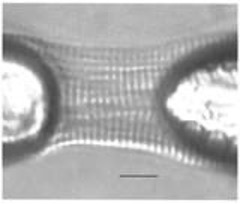
Figure 1: Cardiac Myocyte attached to instruments with UV Curing Adhesive (courtesy of O. Carzola, British Journal of Pharmacology, 2003)
UV or Air Curing adhesives
Adhesives which cure in air such as shellac have been used for many years, though mainly on larger preparations such as skeletal fibers. However, they can and have been used with permeabilized myocytes as well. The shellac is dissolved in ethanol and when put in contact with the cell and exposed to air, it will harden almost immediately. UV curing adhesives such as Norland 67 function in the same way except that the cell does not need to be lifted or moved and exposed to air to set the adhesive. Instead, a small UV emitting diode is used on either end for a few seconds to finalize the cure. These quick setting adhesives can obviously increase experimental throughput immensely and are often easier to clean than their silicone counterparts. However, they are much more difficult to apply and attach to the cell.
UV/Silicone mixtures
Recently some groups have attempted to mix these adhesives in a 50/50 mixture. This appears to retain the best properties of both. Short cure times with a UV diode, but much more viscosity and easier to work with, apply and clean than Silicone glue. Whichever method you choose to try, be aware of the pros and cons of each in order to select the most appropriate one.
Make sure your microscope has the proper configuration
The microscope that you select to use for the experiment must satisfy some basic criteria and is described in a previous blog (How to select a microscope for an ASI muscle physiology system). Despite this, basic mechanical measurements can be done with a relatively simple inverted microscope where two factors are particularly important.
Ensure you have a flat, 3-plate mechanical stage
The 803B bath chamber will adhere directly to the stage (usually strong double-sided tape is a good option) so the stage must be perfectly flat. The best way to make sure this is the case is with a 3-plate stage rather than a mechanical stage added to a flat mount. A mechanical stage is necessary for these experiments as we use it to move the myocyte between droplets of various calcium concentrations and relaxing solution. Not having the chamber mounted perfectly flat will cause a risk of bumping the instruments when moving from well to well. (see Figure 2)

Figure 2: 803B mounted on flat 3 plate stage with adjustment handle in foreground
Long Working Distance objectives are a necessity
Because we activate the cells by moving from solution meniscus to meniscus this means that the cell sits slightly above the level of the microscope stage. Therefore, to be able to properly image the cell (i.e., to set resting sarcomere length), we must have objectives with long enough working distance to focus on the cell. Since we will require relatively high magnification objectives (approximately 40x) we will be pushing the limits of what is available. A minimum of approximately 3mm of working distance is required, and anything more than that is highly desirable. (see Figure 3)
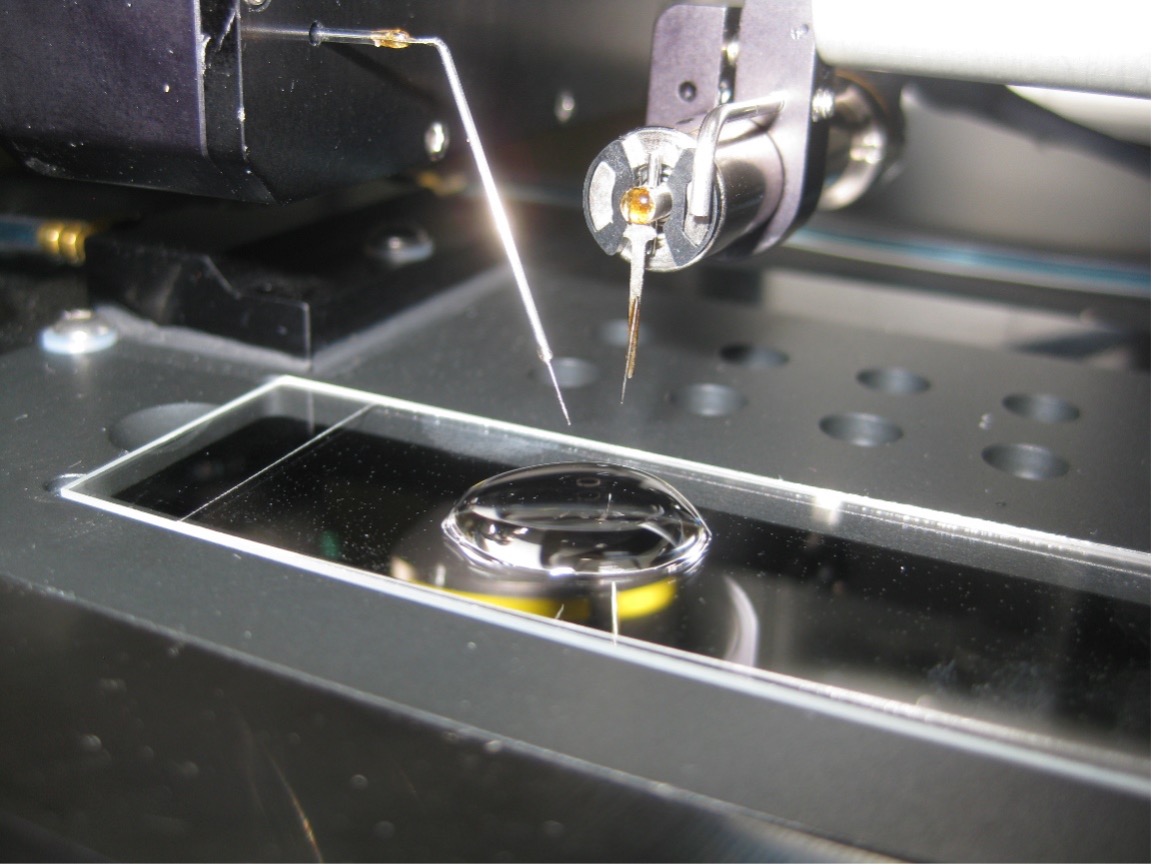
Figure 3: Myocytes in solution droplet before gluing. Note long working distance objective beneath coverslip.
Use magnetic bases to increase flexibility with your vibration isolation table
A vibration isolation table is not an absolute necessity to perform experiments with the 1600A system, but it is highly recommended. Additionally, the vibration isolation table provides a means of mounting the micropositioners securely to a dampened post or rod. However, there is one potential drawback. Most vibration tables will have threaded mounting holes laid out in a grid pattern with fixed spacing distance. This can make the process of lining up the instruments in the center of the focal plane of the microscope a bit cumbersome as we will have a post on either side.
One potential solution is to mount the post on a magnetic base rather than directly to the air table. This allows you to freely position the post/micropositioners at any point on the table relative to the microscope and can even be used to correct small off axis misalignments by rotating the magnetic base. The magnetic bases come with a simple locking mechanism so it is even possible to move the micropositioners and instruments to another location if the microscope must be shared with another setup. (see Figure 4)
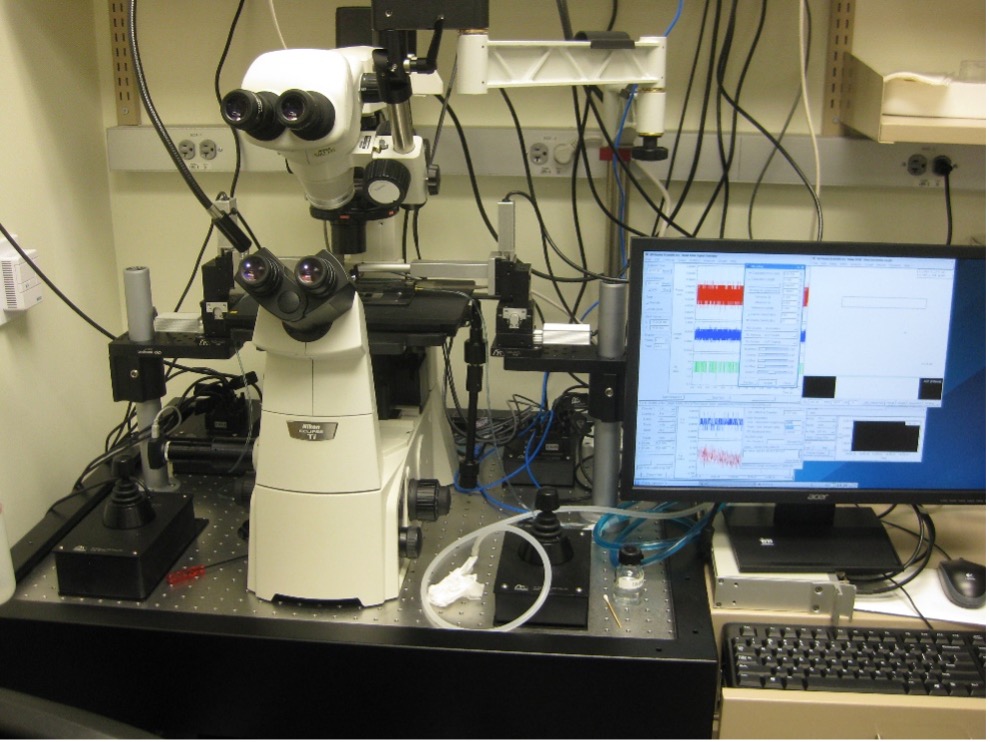
Figure 4: Micropositioners mounted at fixed points on vibration isolation table. Image courtesy of Ambardekar laboratory: University of Colorado Anschutz Medical Campus
Stay tuned to this blog for more upcoming tips and tricks on a wide variety of products and topics!