Now that we have described three methods for attaching muscle to an Aurora Scientific Inc. force transducer and length controller we will now explain how to build the attachment for the tying method.
Motor Attachments
For the motor (315C or 322C) start with a piece of 29 gauge stainless steel tubing that’s about 10mm long. “Dress” the ends by inserting the tubing into a “pin vise” (see part numbers and links below) and using a very fine sharpening stone to smooth the ends of the tubing. Aim for a very smooth end with a fairly abrupt taper (a long taper encourages slipping of the prep). An easy method of achieving this smooth end is to hold the pin vise at an angle of about 60 degrees to the sharpening stone and then lightly drag the end of the tube along the stone while spinning the pin vise in your hand. Examine the end of the tubing under a strong magnifying glass or dissection microscope. Make sure there are no “burrs” or other sharp edges that could cut the prep. It is best to smooth both ends of the tube as this gives you maximum flexibility as to which end to use later when you attach the tube to the lever arm.
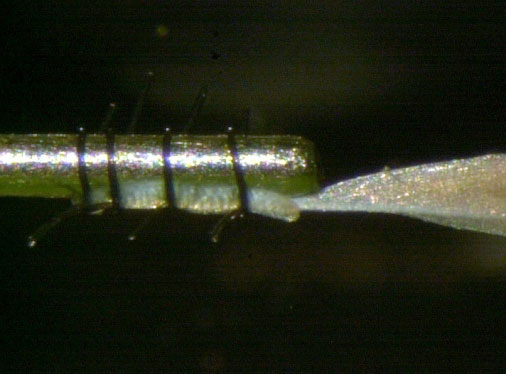
Photo 1 Dressed 29 gauge Hypodermic Tubing
Next put a 90 degree bend in the tubing by chucking it in the pin vise 1/2 way down its length and then, starting with the pin vise at a very shallow angle with respect to a flat surface, slowly raise the pin vise while keeping the half of the tubing that extends from the vise in full-length-contact with the flat surface. Continue to raise the vise until it is normal to the flat surface (at which time the tubing ought to have a 90 degree bend). Too much bend and the tubing will “crimp” and you will have to start over again. Once you have an L-shaped piece of tubing that you are happy with (the legs of the “L” will be on the order of 4.5mm each), you will epoxy it in such a way that one leg is in line with the long axis of the motor arm and the other leg comes off the end of the motor arm at a 90 degree angle. Use 2 hour epoxy (5 minute epoxy isn’t typically waterproof). We suggest that you first “tack” the “L” to the arm using a tiny amount of superglue – this is only to hold the “L” in place while the epoxy is curing. The 315C motor is very sensitive to added mass. You may need to make the “L” about 3mm x 3mm when used with a 315C. Also use the minimum amount of epoxy that will get the job done. Even the added mass of the epoxy can have a detrimental effect on motor tuning.
Force Transducer Attachments
For the 400A series force transducer, the length of tubing will depend in part on bath configuration. As a rule of thumb use the shortest tube that will do the job (since added mass reduces the frequency response). A reasonable length for the tube is approximately 13mm, 5mm of which will be inside the glass capillary output tube of the force transducer with the remaining 8mm outside. Dress the ends of the tubing as described above and then epoxy one end inside the output tube. Don’t try to get the stainless tube concentric with the glass output tube, this can be very difficult. Instead let its outside surface rest against the inner surface of the output tube, this ensures that the stainless steel tubing and the glass output tube are lined up. Getting epoxy in the coupling tube is a bit of a trick. The best way to do this is to dip the end of the tubing in the epoxy pool and then insert it. We suggest you rotate the tube as it is inserted to help distribute the glue over the surface. It takes very little glue to make this connection. You will want to keep an eye on the tube as the epoxy cures, making constant minor adjustments to maintain a straight stainless steel extension. We find it quite helpful to mount the force transducer on the apparatus (ASI 801C or 802D) before gluing the stainless tube in place. This way you can use the slot cut into the end of the bath to hold the free end of the tube while the glue dries. The micro-manipulator XYZ stages included on the ASI apparatus allow you to move the transducer with respect to the slot in the bath plate to ensure the tube is directly inline with the transducer’s output tube.
Hypodermic Needle Tubing: McMaster-Carr Catalogue #8988K429, or, in a pinch, use a 29 gauge hypodermic needle and cut the needle and Luer fitting off.
Pin Vise: McMaster-Carr Catalogue #8455A16
Sharpening stones: McMaster-Carr Catalogue #4456A17